arrow_back_ios

Main Menu

See All Acoustic End-of-Line Test Systems See All DAQ and instruments See All Electroacoustics See All Software See All Transducers See All Vibration Testing Equipment See All Academy See All Resource Center See All Applications See All Industries See All Insights See All Services See All Support See All Our Business See All Our History See All Our Sustainability Commitment See All Global Presence
arrow_back_ios

Main Menu

See All Actuators See All Combustion Engines See All Durability See All eDrive See All Production Testing Sensors See All Transmission & Gearboxes See All Turbo Charger See All Industrial electronics See All S&V Signal conditioner See All DAQ Systems See All Power Analyser See All S&V Hand-held devices See All High Precision and Calibration Systems See All Test Solutions See All DAQ Software See All Drivers & API See All nCode - Durability and Fatigue Analysis See All ReliaSoft - Reliability Analysis and Management See All Test Data Management See All Utility See All Vibration Control See All Acoustic See All Current / voltage See All Displacement See All Load Cells See All Pressure See All Strain Gauges See All Torque See All Vibration See All LDS Shaker Systems See All Vibration Controllers See All Power Amplifiers See All Accessories for Vibration Testing Equipment See All Training Courses See All Acoustics See All Asset & Process Monitoring See All Custom Sensors See All Data Acquisition & Analysis See All Durability & Fatigue See All Electric Power Testing See All NVH See All Reliability See All Smart Sensors See All Vibration See All Weighing See All Automotive & Ground Transportation See All Calibration See All Installation, Maintenance & Repair See All Support Brüel & Kjær See All Release Notes See All Compliance See All Our People
arrow_back_ios

Main Menu

See All QuantumX See All LAN-XI See All SomatXR See All MGCplus See All CANHEAD See All Optical Interrogators See All GenHS See All API See All Accessories for acoustic transducers See All Acoustic Calibrators See All Microphone Cartridges See All Microphone Pre-amplifiers See All Microphone Sets See All Sound Sources See All Special Microphones See All Experimental testing See All Transducer Manufacturing (OEM) See All Rotating See All Non-rotating (calibration) See All CCLD (IEPE) accelerometers See All Charge Accelerometers See All Electroacoustics See All Noise Source Identification See All Environmental Noise See All Sound Power and Sound Pressure See All Noise Certification See All Industrial Process Control See All Structural Health Monitoring See All Electrical Devices Testing See All Electrical Systems Testing See All Grid Testing See All High-Voltage Testing See All Vibration Testing with Electrodynamic Shakers See All Structural Dynamics See All Machine Analysis and Diagnostics See All Dynamic Weighing See All Calibration Services for Transducers See All Calibration Services for Handheld Instruments See All Calibration Services for Instruments & DAQ See All On-Site Calibration See All Resources See All Software License Management

Failsafe Press Load Monitoring

Measurement Technology as an Efficiency Driver

Press manufacturers are confronted with increasing technological and cost pressure: Many customers demand faster and ever more precise presses. The use of measurement technology is key to improving the presses. Precise force measurement is of vital importance - for example, using the extremely space-saving and highly accurate method of force shunt measurement - as well as targeted use of intelligent measurement electronics. This enables easy and cost-effective retooling and upgrading of existing designs.

The more precisely force is applied in presses, the higher is the quality of the molded parts. Increasing their presses' accuracy is one of the most important challenges for manufacturers of presses and pressing machines. And, in addition: The market requires increasingly faster presses that, at the same time, offer higher bandwidth to increase production output in existing systems. Modern and intelligent solutions help to make machines faster, better and more efficient.

Key factors for the successful use of measurement equipment include, for example:

  • Reliable and precise force measurement in the press
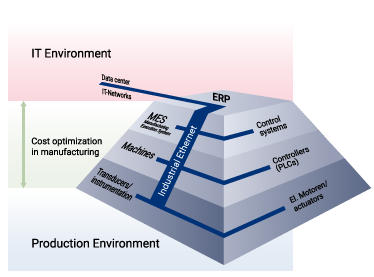
  • Use of intelligent measurement electronics for fast and easy connection to Industrial Ethernet standards
  • Professional measurement software for controlling the monitoring of joining processes.

Modern production can no longer do without presses in a wide range of designs. Fields of application include minting presses as well as assembly presses for vehicle parts or commodities, or presses used for huge metal parts in the automotive industry.

The presses' size and conditions of use may vary, however: The forces exerted by the press, the number of strokes and the quality of the products manufactured during the pressing procedure are major characteristic quantities for all presses.

An electronic press control system acquires and monitors these machine parameters in modern pressing machines. At the same time, it identifies defective components and rejects them. It also records production and down times - an important indicator of the effectiveness in processes.

Reliable press force measurement

Normally, force or displacement measurement is used to monitor pressing procedures. There are two different methods available for force monitoring:

  • Direct force measurement in the press tool's force flow
  • Force shunt measurement, for example, using strain transducers

In both cases, it is essential that press forces are reliably and quickly recorded by sensors and transmitted to the press control system using adequate amplifier electronics. Sensors and amplifiers need to meet particularly high requirements in terms of ruggedness and operational reliability. Easy mounting and integration of the components with existing machine concepts is a critical factor that needs to be taken into account when choosing the right equipment.

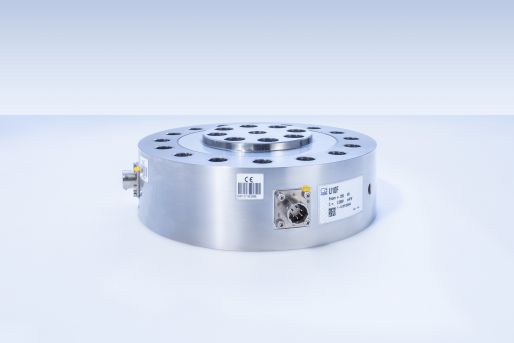
Both force measurement methods have specific advantages and drawbacks. In general, when measuring force directly in the force flow it must be kept in mind that the force transducer is an integral part of the tool and thus significantly impacts on its properties. Furthermore and, in particular, with huge forces, the force transducers need to have sufficiently high nominal (rated) forces. Such sensors are very heavy and, in addition, expensive. It is beneficial that HBM force transducers are calibrated at the factory and therefore need not be calibrated in the system where they are used. The force in N can be directly determined after assembly.

null
null

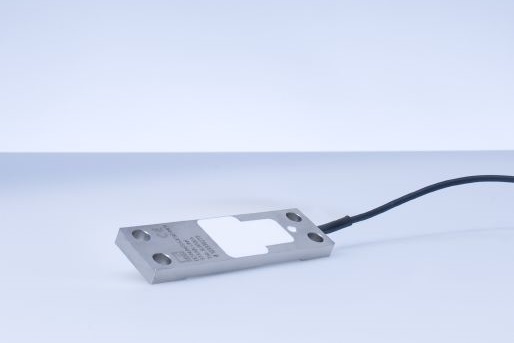
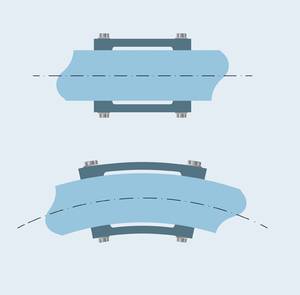
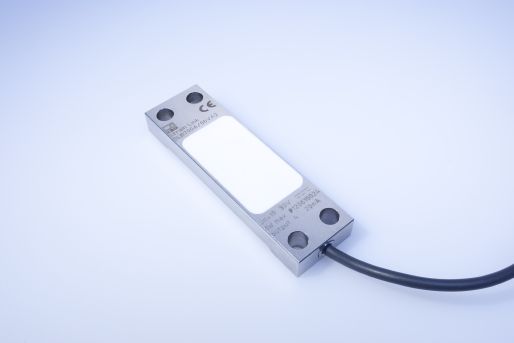
Strain transducers based on the following operating principle are available as an alternative: Every press uses a structure that is mechanically stressed during the pressing procedure. This causes minimal, invisible deformation. Strain transducers, for example, SLB700A from HBM measure this deformation which, in the end, is proportional to the press force.  The advantage of this method is that the same sensor can be used, irrespective of the pressing power. Measurement using strain transducers is a cost-effective alternative, in particular with high-performance presses. The accuracy of force measurement with a calibrated force transducer cannot be achieved using this method, however, HBM strain sensors easily meet the regular accuracy requirements for press applications. Calibration is required in any case to determine the relationship of the output signal and the applied force.

Strain-gauge or piezoelectric technology

Which measurement principle is better suited?

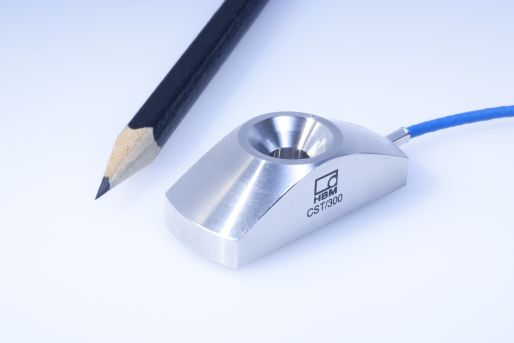
HBM offers both piezoelectric strain transducers (CST/300) and strain gauge-based transducers (SLB700A). Both sensor types can be used in many cases. Piezoelectric sensors offer the advantage of being very compact and offering high sensitivity thus enabling the sensor to be used also with very small strains - ideal with very stiff objects. Furthermore, fastening the sensor requires only one screw.

Strain gauge (SG) technology-based strain transducers are also available with integrated amplifier electronics. This configuration is first choice when particularly cost-effective solutions are required. In addition, SG sensors have no drift, which facilitates monitoring tasks. They also enable permanent changes in strain to be monitored in the press. Bending moments can be compensated for through smart wiring, thus improving measurement accuracy at little effort.

Using strain transducers to compensate for bending moments

With strain gauge-based strain transducers, potential bending moments can easily be compensated for when symmetrical components are involved. This requires that two sensors are mounted at the same height, however, opposite from each other. Bending causes one sensor to be loaded with a positive and the other sensor with a negative strain. When the sensors are connected in parallel, the total output signal is "zero". All strains loading both sensors in the same direction are measured without any problems. In press applications, this guarantees that tensile/compressive strains only are measured.

Low height of construction and uniform sensitivity of the sensor are technical prerequisites. For this reason, HBM strain sensors are adjust to a uniform sensitivity using a special procedure. Furthermore, the output resistance is balanced, which is a prerequisite for parallel connection. The bridge resistance of 700 ohms is selected to prevent overloading of the bridge amplifier as a result of the decreasing overall resistance. Even four sensors connected in parallel have a resistance of 175 ohms. Modern amplifiers enable the force or strain signals of both single force or strain transducers and sensors connected in parallel to be measured and processed.

null

As already mentioned above, strain transducers need to be calibrated to enable a force to be derived.

The calibration procedure requires that force is measured at two load steps at least; for example: force = zero and maximum force. It is important to know that it is not absolutely necessary to measure at maximum force. It is absolutely possible to calibrate the measuring chain at half the process force, in particular, when accuracy requirements are low.

The process is as follows:

  • Measurement of the strain transducer's output signal at zero force. The amplifier should be set to prevent scaling, i.e. the output signal is displayed in mV/V.
  • Measurement of the output signal at the force to be used for calibration. In this case, as well, measurement is to be in mV/V.

It is now easy to calculate the measuring chain's sensitivity:

S = (output at meas. force - output at zero) / (meas. force - force at zero)

This gives a value in pC/N when a piezoelectric sensor is used. The same applies for SG-based strain transducers, however, with the value being specified in mV/V/N.

In many cases, the sensitivity at a specific strain has become accepted as the scaling value for instruments in SG measurement technology. This only requires the sensor's output signal at nominal (rated) force to be known. You can directly enter the pair of values of force and output signal in your device. Many instruments facilitate these settings requiring only the four above mentioned values that can be allocated in a table:

Force = 0 N        Signal = xy mV/V

Force = measuring force    Signal = AB mV/V

Amplifiers then perform the setup. Scaling is carried out afterwards. This "Teach-In" process is implemented in modern amplifiers which enable automated calibration.

The following tips are important:

  • Verification is always recommended, i.e. the system should be loaded again and the display values compared.
  • Load the system three times with maximum load prior to the calibration procedure to ensure settling of the sensors.
  • To achieve optimal accuracy it is ideal to measure exactly at the same force at which measurements will be taken later.

Integrated electronics or smart amplifiers with measurement data preprocessing?

Strain transducers with integrated electronics are available for basic press monitoring tasks; they provide current (4 … 20 mA) or voltage (0 … 10 V) output signals at very high bandwidth (2 kHz, -3 dB). Here the downstream press control system needs to take over signal conditioning and measurement signal processing. These are additional tasks besides the actual press control function.

The amplification is adjusted in line with the approach described above: Firstly, measurement is taken at zero point then at maximum force. With those two forces a voltage can be applied to an SLB control input. The amplification is automatically adjusted such that force = 0 corresponds to 1 V and maximum force to 9 V. Scaling between 1 and 9 V output signal is recommended to enable forces below the zero point or higher than the "Teach-In" maximum force to be measured. Since the output span is between 0 and 10 V, the sensor has a buffer of 10% of the measuring range.

In contrast to conventional sensors with integrated electronics this amplifier allows that the maximum range is always available at the output, irrespective of the strain at the machine. With a low resolution of the next step this is an advantage that should not be underestimated.

"Teach-In" is started via a control pulse and can therefore be automated. Irrespective of this, the measuring point can be set to zero. The amplifier configuration continues to be available after a power failure.

Increasing demands on modern press monitoring systems

Press operators' requirements have continued to become more stringent over the past years. Besides cost reduction, the focus is on quality enhancement and increased output rates. On the other hand, prolonged service life and minimized maintenance intervals are required. The only way to meet these requirements is to use modern force and displacement or angle-of-rotation amplifiers.

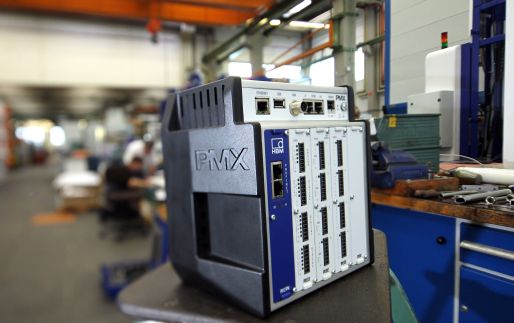
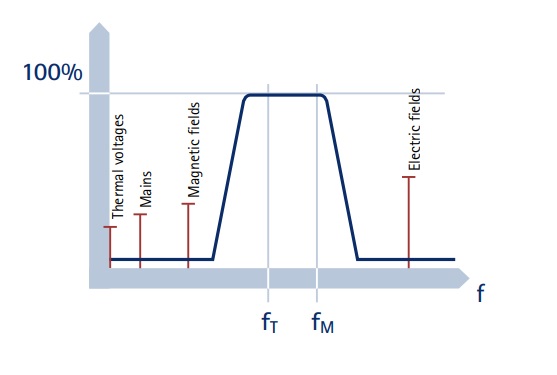
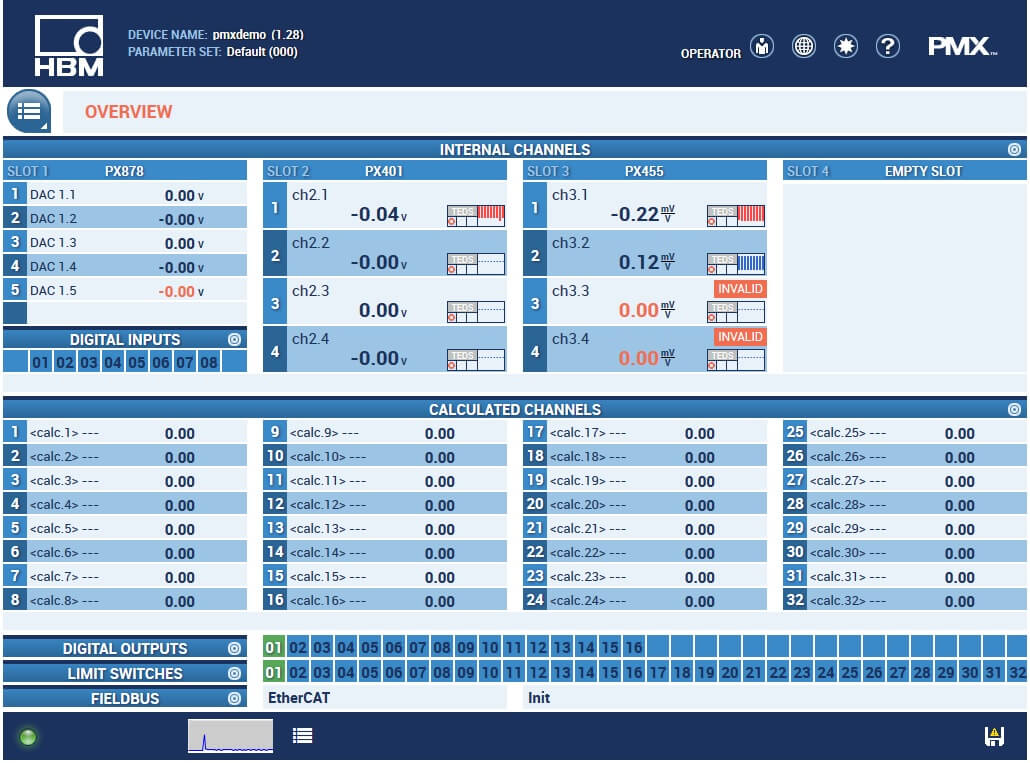
These amplifiers are characterized by extreme noise immunity going far beyond the requirements of the relevant standards. Moreover, these amplifiers offer measurement data preprocessing. Thus relieving the strain on downstream press control systems and enhancing system reliability and minimizing down time, respectively. The amplifiers can be universally used. The instruments can be fitted with the appropriate number of measuring modules, depending on the size of the press and the number and type of measurement sensors. In addition, the amplifiers can also be flexibly fitted with signal output cards. Investment costs are significantly reduced and replacement in the event of failure is very easy. The PMX industry amplifier or the stackable signal conditioners of the ClipX series are amplifier systems that perfectly meet these requirements.

Increased noise immunity provides reliable measurement values

The amplifier can be "upgraded" to meet changing press monitoring requirements. In the most straightforward case, the extremely reliable PX455 carrier-frequency amplifier module is used to acquire force and strain. During carrier frequency measurements, the measurement signals are sampled at 19.2 kHz, modulated to a carrier frequency, then amplified and later demodulated. This method enables measuring bandwidths of 2 kHz to be achieved and, at the same time, prevents the transmission of noise signals such as mains hum and interference caused by huge electric motors or frequency converters. This substantially increases machine service life.

How much intelligence do you need?

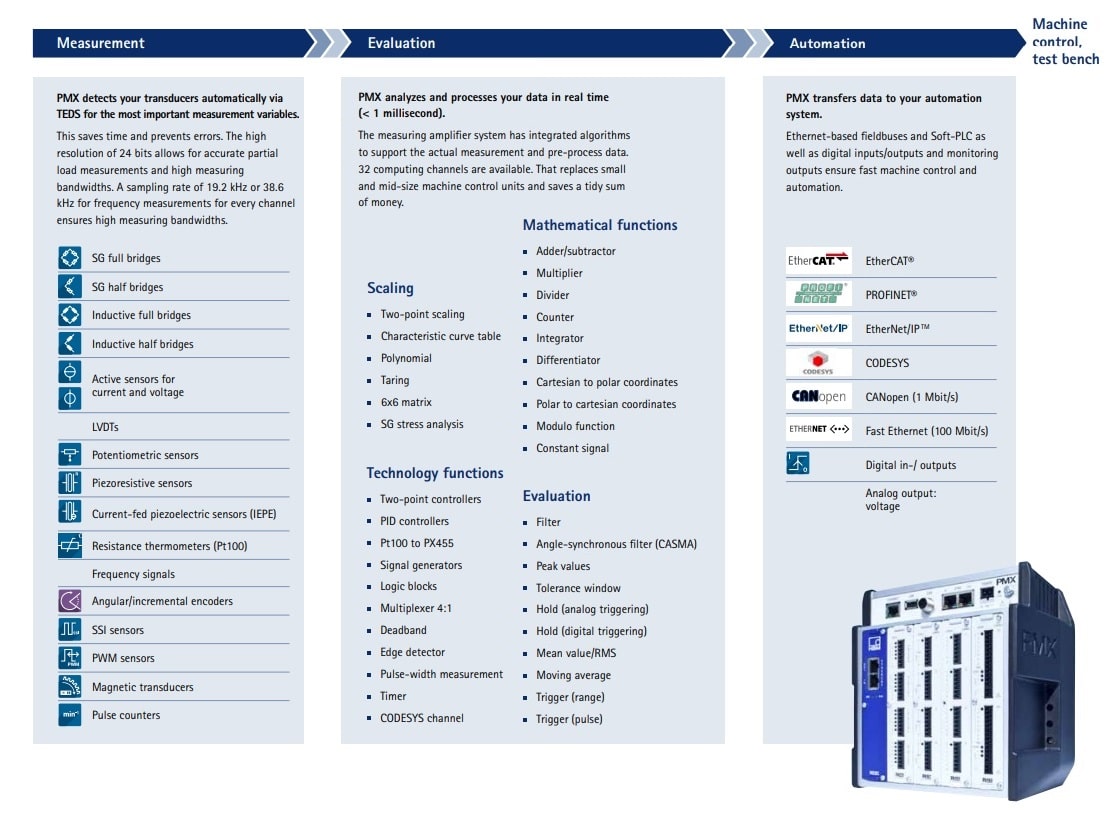
The PMX amplifier's internal calculation channels providing sampling rates of 19.2 kHz per measurement channel enable all measurement signals from the press to be quickly acquired and processed. The high sampling rates permit reliable acquisition of force peaks up to 50 µ/s. These peak values are used for quality assurance and press control. The internal calculation channels enable total and differential forces in multi-column presses to be acquired in real time. This, in turn, allows the machine control system to monitor the state and quality of the die cushion or press, respectively.

Preventive press diagnostics

Alarm limits can be monitored in addition to the acquisition of press force peak values. This allows to detect in advance whether the forces exerted by the press are shifting outside the tolerance range and/or have already reached a level that requires the system to be shut down to protect the machine against damage. Like all calculated signals in the PMX, these values are also determined in real time, i.e. in intervals of 50 microseconds. This is essential to ensure rapid emergency shutdown. There are, however, further methods of preventive press diagnostics. Acceleration sensors are installed to measure vibration in the presses. Vibration is caused by the mechanical components' bearing clearance. It is acceptable within specified limits. Only when the vibrations become excessively high can bearing damage be indicated and detected. Again, the PMX amplifier is used for analysis and limit value detection, because it has correspondingly fast amplifier modules. The same applies for acquiring temperatures in presses or cooling systems.

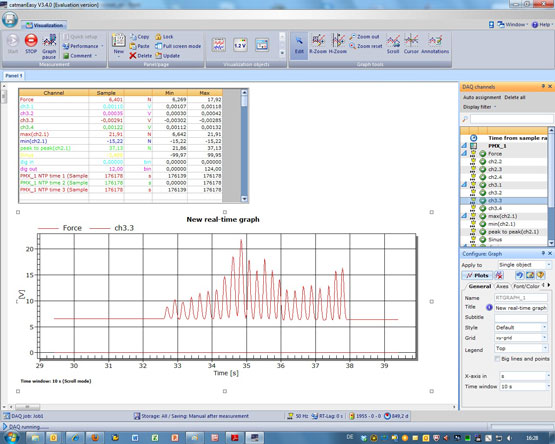
HBM provides catman software for acquiring quality data. The PMX comes with an Ethernet system interface for connection, for example, to a Windows PC. It is used to record all measurement and machine signals. These recordings can be archived and used as backup. The visualization tools offer versatile and detailed options for displaying and analyzing press signals already during setup. The software also provides functions for setting measurement triggers to start and save a measurement only after a fault has occurred.

Which form of automation can be selected?

All signals are available in real time in the PMX or ClipX calculation kernels. From there, the values can be output to a cloud via analog outputs, fieldbus interfaces, or additionally via OPC-UA, for example. The measuring amplifiers also have fast digital outputs that can signal and pass on the limit values within just one millisecond. Modern press control systems, however, often feature a programmable logic controller (PLC). Here, signals are transmitted via standardized fieldbuses. These have two major advantages.

On the one hand, one bus cable is required, which substantially reduces the wiring effort. On the other hand, diagnostic data can be transmitted from the amplifier to the control system in addition to the measurement signals, thus allowing fast, anticipatory machine monitoring. A further advantage of the amplifier is that up to 1000 parameter sets can be stored internally and loaded as required. This allows adaptation of the press to new tasks virtually without any loss of time.

null

Concepts for intelligent service and maintenance

PMX and ClipX amplifier systems feature multiple mechanisms for diagnostics and maintenance control. Firstly, all sensor signals and internal components of the instrument are permanently checked for plausibility. This enables direct signalization of defective sensors, cable breaks or defective devices in the press control system. Setting limit values and tolerance bands in the PMX allows identifying and reporting deviations from a trend already before a machine is damaged or breaks down. In case of a failure, detection of whether or not PMX is operative (Live-Bit) is possible and enables fast troubleshooting. This also means that PMX displays the force signals in simultaneously via several analog outputs. This enables on-site service engineers at the press to use measuring instruments at hand for determining whether the signals are available as requested. This permits further fault limitation in the control system.

However, PMX offers even more mechanisms for intelligent maintenance. In addition to parameterization and visualization of the instrument via the internal web server, it is also possible to transmit data through the machine or company network for display, since standard Ethernet TCP-IP protocol is used for transmission. Provided that safety measures such as a firewall and service access via SNMP protocol are available, diagnostics through to the PMX is even possible in the form of worldwide remote maintenance. Three-level user administration in the PMX ensures that all users can only work on data and make settings that are relevant to them. The system operator can thus decide whether expensive deployment of service from the headquarters is required or an on-site service engineer can solve the problem.
 

Can existing plants be retrofitted with press control systems?

In general, all presses can be retrofitted with modern monitoring systems from HBM. Upgrading and retrofitting makes sense, in particular, in times of difficult economic conditions. Not only is the quality of manufactured products increased, but also the service life of the press substantially prolonged. HBM offers technical know-how to enable the optimal position for the installation of force or strain transducers to be determined using FEM analysis. They differ for each press, depending on the design and, later, are decisive for the significance of the measurement data. Furthermore, HBM's service engineers are skilled experts in installing the strain gauges in the press or mounting the complete strain transducers. HBM also offers to handle project preparation and management, ranging from electrical integration through fieldbus connection and documentation. Should force measurement chains be calibrated or re-calibrated later on, HBM's service engineers are ready to carry out the calibration on site and provide documentation.

Conclusion

Integrating modern monitoring systems based on measurement technology is key to increasing the accuracy and bandwidth of presses. Precisely measuring press forces is of vital importance - for example, using force transducers installed directly in the force flow or strain transducers for indirect force shunt measurement.

The use of state-of-the-art measuring amplifier systems offering easy and convenient connection to common industrial Ethernet standards and machine control systems is another crucial factor for modern press monitoring systems. HBM provides solutions for both the sensors and the electronics used in press monitoring. Leading manufacturers worldwide place their trust in equipment from HBM to increase the performance and operational readiness of their presses.
 

null

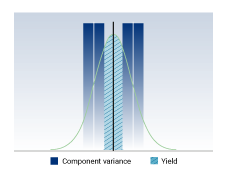
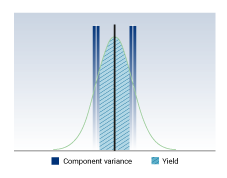
Process monitoring with conventional measuring amplifier, high rejection rate due to measuring inaccuracies.

null

Increased efficiency with PMX or ClipX, optimum yield with precise measurement results

Related Products

No more result to load